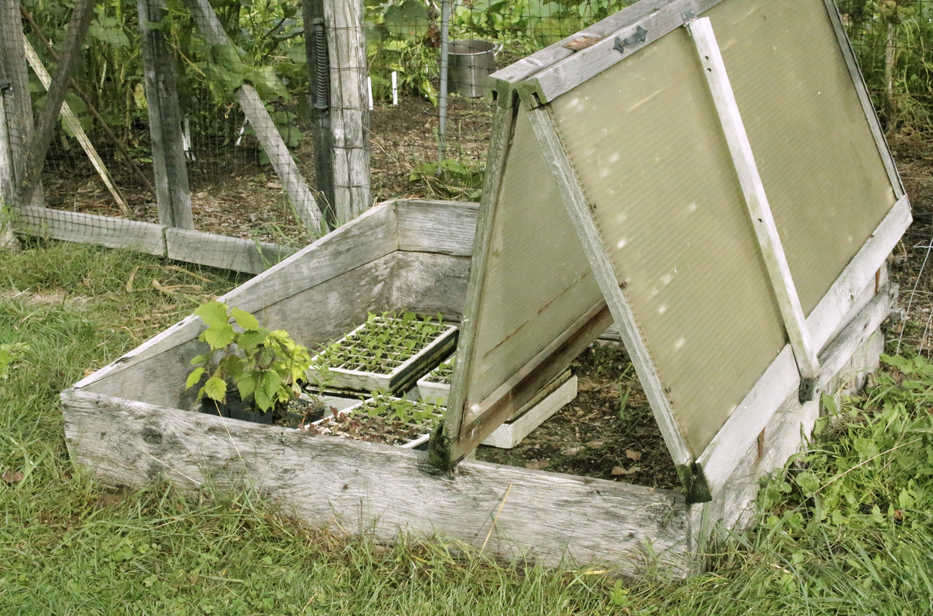
In one weekend, you could effectively move your garden — or at least part of it — a few hundred miles south. If you’re handy, you could do it in less than a day.
Do this by building a coldframe — a bottomless box with a clear plastic or glass cover.
Heat trapped in a coldframe keeps lettuce, spinach, and other hardy salad greens fresh and growing throughout winter. This warmed area can also provide a winter home for rooted cuttings and perennials that are not quite cold-hardy. In the coldframe, plants might grow right in the ground or in containers.
Next spring, use the coldframe to start or harden off seedlings or for earlier vegetables or flowers. The sun’s warmth, trapped within a coldframe, keeps the box warmer later into fall and in winter, then advances the season there in spring.
Select some sort of clear covering for a coldframe first, because the rest of the structure will be built to accommodate its size. Typical dimensions are some multiple of about 2-by-5 feet.
An old window sash is often available for free, is already mounted in a wooden frame, and is conveniently sized for single or multiple use.
Various kinds of plastic are another option. Plastic has the advantage of being less breakable than glass, and it can be cut with standard woodworking tools. Make rectangular frames from 1-by-2 or 2-by-2 wood, glued, braced and screwed at the corners. Either screw the plastic to the frame or create grooves into which the plastic can slide.
Polycarbonate plastic is an especially good choice. It resists degradation in sunlight, so is often used for greenhouses, and comes in double wall to increase its ability to hold in heat.
To capture the most sunlight and let rainfall run off, the top of the coldframe should slope down from the back to the front. Create this sloping box in two sections, using 1-by-12 or 2-by-12 lumber.
For the lower section, merely join the lumber in a rectangle that corresponds to the dimensions of the cover(s). Rot-resistant lumber lasts longest, but any lumber can be used if you screw a sacrificial 2-inch strip of wood onto all the edges that will make ground contact. Unscrew and replace this strip when it rots away.
For the upper part of the box, cut another 12-inch-wide board the same length as either of the sides. With a straightedge, draw a diagonal line from one corner to another, then cut along this line. For the upper back of the box, cut a board to the same length as the bottom back of the box. Screw the three pieces together.
Attach the upper part of the box to the lower part with 2-by-2 lumber, two 22-inch lengths and two 11-inch lengths, screwed into the corners. These 2-by-2’s also strengthen the coldframe.
Usually, covers are hinged to the base at the rear, making them easy to prop up to varying degrees, depending on sunlight and temperature.
Another option is to hinge adjacent covers together side by side, and then hinge one of the sides to the edge of the base. This cover opens and closes like a bi-fold door, with its free edge resting on the base to prop it open.
If the area isn’t too windy, covers could be free of hinges, merely sliding up and down on the base frame.
The covering will have to be opened on bright sunny days, sometimes even in winter and surely as the sun grows stronger in spring. One piece of scrap board, cut 12 inches long by 6 inches wide, per covered section makes a convenient prop. Use the flat side — about an inch thick — to crack the one or more covers open for slight venting. Progress to the 6-inch dimension and then the 12-inch one when more venting is needed as spring approaches.
A coldframe adds a useful and interesting dimension to your gardening. Monitor and adjust temperatures, water, and fertility closely, and watch how your plants respond.

